
The Secure Brain: Building Role-Based RAG Architectures from Ingestion to Retrieval
Data privacy is the #1 hurdle for enterprise AI. Learn how to architect a production-grade Role-Based RAG system that ensures users only see what they are authorized to access, from ingestion to real-time retrieval.
In the rush to deploy Generative AI, many enterprises have fallen into a dangerous trap: the "Vanilla RAG" leak.
You know the story. You build a beautiful Retrieval-Augmented Generation (RAG) system. It can answer questions about company policies, technical docs, and project updates. But then, a junior developer asks, "What is the CEO's salary?" or "Show me the performance reviews for the engineering team," and of course, the AI—being a helpful, data-grounded assistant—happily obliges with exact figures from the private HR folder.
This is the nightmare scenario for every CISO and IT Director. The problem isn't the AI; the problem is the Architecture. In a standard RAG setup, the "Retrieval" step often treats the entire vector database as a flat, accessible playground.
To build a production-grade system, we need Role-Based RAG (RB-RAG). We need a system that respects the same security boundaries as your file system, your databases, and your cloud permissions.
In this guide, we will walk through the entire lifecycle of a Role-Based RAG architecture—from the moment data enters the system to the final second before a user sees an answer.
1. The Strategy: Identity-First Retrieval
Before we write a single line of code, we have to understand the core mental model. In a traditional RAG, the flow is:
User Query -> Vector Search -> Context -> LLM Answer.
In a Role-Based RAG, the flow is:
User Identity -> Permission Filter -> User Query -> Scoped Vector Search -> Context Validation -> LLM Answer.
We aren't just searching for the "most similar" text. We are searching for the "most similar text that this specific user is allowed to read."
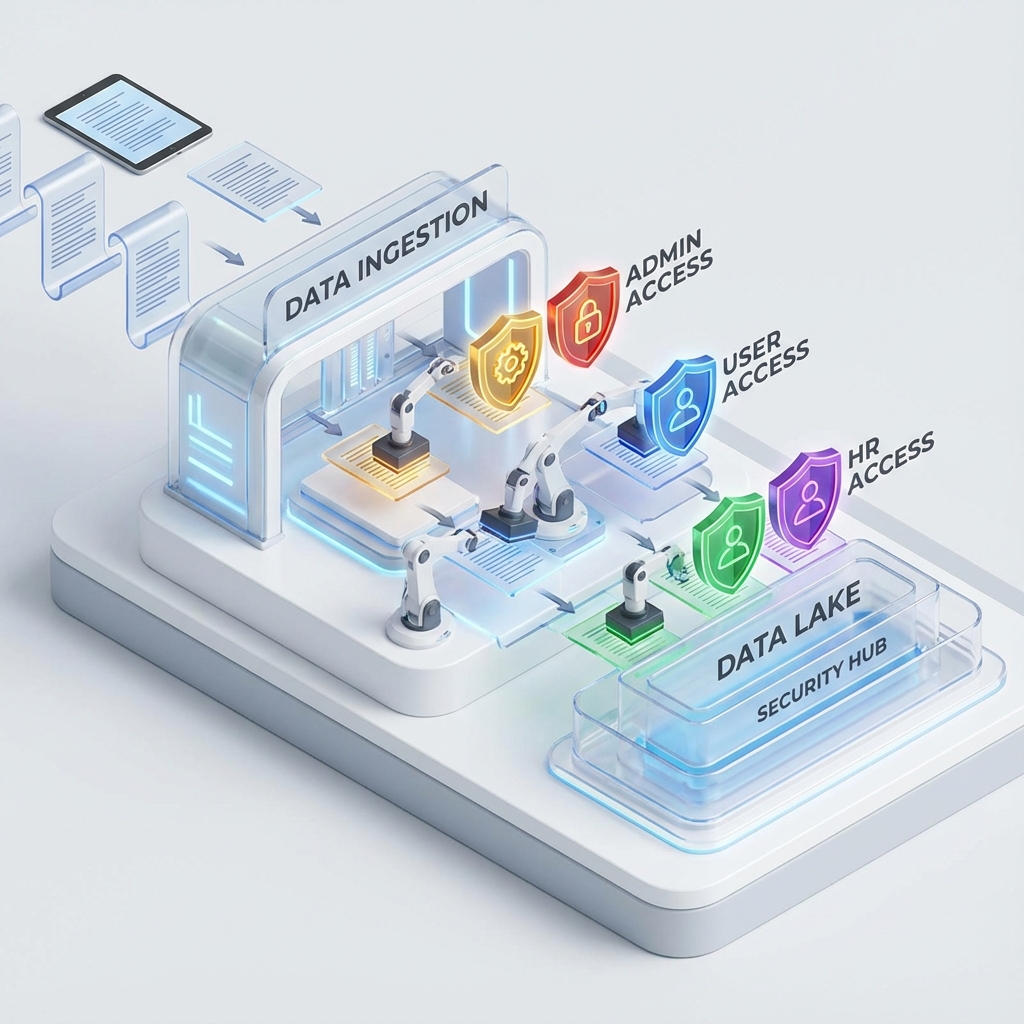
2. Ingestion: Stamping the Security Passport
Security starts the moment a document is picked up by your ingestion pipeline. If you don't know "who owns this data" at the time of ingestion, you can't filter it at the time of retrieval.
Tracking Metadata based on the Role
When we "chunk" a document (splitting it into smaller pieces for the AI), we must attach a "Security Passport" to every single chunk. This metadata should include:
owner_id: The user who created the doc.allowed_groups: A list of roles (e.g.,['admin', 'hr', 'exec']).security_level: A numeric rank (e.g.,1for public,5for top secret).department_id: To prevent cross-department leaks.
Python Code: Secure Ingestion with LangChain
Here is how you might implement a secure ingestion processor that stamps metadata from your source system (like SharePoint or S3 tags).
import os
from uuid import uuid4
from langchain_core.documents import Document
from langchain_text_splitters import RecursiveCharacterTextSplitter

class SecureIngestor:
    def __init__(self, vector_store):
        self.vector_store = vector_store
        self.text_splitter = RecursiveCharacterTextSplitter(
            chunk_size=1000,
            chunk_overlap=100
        )

    def process_file(self, file_content, file_metadata, user_context):
        """
        user_context: { "role": "hr_manager", "department": "human_resources" }
        file_metadata: { "source": "payroll_2025.pdf", "original_acl": "HR_ADMIN_ONLY" }
        """
        # 1. Split text into chunks
        chunks = self.text_splitter.split_text(file_content)

        # 2. Wrap chunks in Document objects with Security Metadata
        documents = []
        for chunk in chunks:
            doc = Document(
                page_content=chunk,
                metadata={
                    "id": str(uuid4()),
                    "source": file_metadata["source"],
                    "access_role": file_metadata["original_acl"], # The CRITICAL stamp
                    "department": user_context["department"],
                    "ingested_by": user_context["role"],
                    "timestamp": "2026-01-06T08:00:00Z"
                }
            )
            documents.append(doc)

        # 3. Add to Vector Store
        self.vector_store.add_documents(documents)
        print(f"Ingested {len(documents)} chunks with role requirements: {file_metadata['original_acl']}")
The "Sovereignty" Principle
In a role-based system, your ingestion pipeline should be "Identity-Aware." You shouldn't have one giant "Service Account" that reads everything and dumps it into one bucket. Ideally, your ingestion workers should run with the context of the data they are processing.
3. Architecture: The Secure Data Flow
How does this look in practice? We need to visualize the boundaries between our User, our Application (The Orchestrator), and our Knowledge Base (The Vector Store).
graph TD
    User((User))
    IDP[Identity Provider: Okta/Azure AD]
    App[RAG Orchestrator: LangGraph]
    Vector[(Vector Database: Pinecone/OpenSearch)]
    LLM[Language Model: Claude 3.5]

    User -->|Login| IDP
    IDP -->|JWT Token + Roles| App
    User -->|Query: 'What is our Q1 budget?'| App

    subgraph "The Security Gate"
        App -->|Query + Metadata Filter| Vector
        Vector -->|Filtering Logic| Vector
        Vector -->|Authorized Chunks| App
    end

    App -->|Prompt + Secure Context| LLM
    LLM -->|Final Answer| User
4. Retrieval: Filtering at the Source
This is the most critical step. We must never perform an "unfiltered" vector search and then try to hide the results from the user later. If you retrieve unauthorized data into the application memory, you’ve already created a vulnerability.
Filter on Vectors using Metadata
Most modern vector databases support Metadata Filtering. This is a hard constraint applied during the search.
If a user with the role Junior_Dev asks a question, the vector database should effectively run:
SELECT chunks WHERE similarity > 0.8 AND access_role IN ('public', 'engineering')
Code: Secure Retrieval with Python and Pinecone
Let’s look at how we pass these filters using LangChain's vector store wrappers.
from langchain_pinecone import PineconeVectorStore
from langchain_openai import OpenAIEmbeddings

def secure_search(user_query, user_roles):
    """
    user_roles: ['engineering', 'employee']
    """
    embeddings = OpenAIEmbeddings()
    vectorstore = PineconeVectorStore(index_name="company-knowledge", embedding=embeddings)

    # We build the filter based on the user's specific roles
    search_filter = {
        "access_role": {"$in": user_roles}
    }

    # The search is physics-bound to the user's permissions
    results = vectorstore.similarity_search(
        user_query,
        k=4,
        filter=search_filter
    )

    return results

# Example Usage
docs = secure_search("What is the roadmap for Project Phoenix?", ['engineering'])
for d in docs:
    print(f"Content: {d.page_content[:50]}... [Role Required: {d.metadata['access_role']}]")
5. The "Validation" Layer: Trust but Verify
Even with perfect metadata filters, "Smart" attackers can try to trick your RAG system. They might use "Prompt Injection" to try and infer information that isn't directly returned but might be hinted at in authorized documents.
How to validate that the user is not getting more than they should see
We implement a Dual-Validation Strategy:
- Pre-Retrieval Validation: An LLM (or a rule-based system) checks the query itself. If the user asks for "CEO Salary," the system checks if the user has
HR_ADMINrole. If not, it rejects the query before even hitting the database. - Post-Retrieval Audit: We use a "Guardrail" or a "Critic" agent to review the retrieved context and the final answer.
Implementing Guardians with LangGraph
Using LangGraph, we can create a deterministic state machine that includes an "Audit Node."
from typing import TypedDict, List
from langgraph.graph import StateGraph, END

class AgentState(TypedDict):
    query: str
    user_roles: List[str]
    retrieved_docs: List[Document]
    answer: str
    is_authorized: bool

def authorization_gate(state: AgentState):
    # Rule engine check: Is the query sensitive?
    sensitive_keywords = ["salary", "payroll", "performance", "password"]
    if any(k in state['query'].lower() for k in sensitive_keywords):
        if "admin" not in state['user_roles']:
            print("Access Denied: Sensitive query from unauthorized user.")
            return {"is_authorized": False}
    return {"is_authorized": True}

def retrieve_node(state: AgentState):
    if not state["is_authorized"]:
        return {"retrieved_docs": []}

    docs = secure_search(state['query'], state['user_roles'])
    return {"retrieved_docs": docs}

def generator_node(state: AgentState):
    if not state["retrieved_docs"]:
        return {"answer": "I'm sorry, I don't have access to that information."}

    return {"answer": "Generated secure answer..."}

# Construct the Graph
workflow = StateGraph(AgentState)
workflow.add_node("auth", authorization_gate)
workflow.add_node("retrieve", retrieve_node)
workflow.add_node("generate", generator_node)

workflow.set_entry_point("auth")
workflow.add_edge("auth", "retrieve")
workflow.add_edge("retrieve", "generate")
workflow.add_edge("generate", END)

app = workflow.compile()
6. Advanced Topics: Partitioning vs. Filtering
When you reach massive scale, you have a choice:
- Shared Vector Store (Filtering): All data in one index, filtered by metadata.
- Isolated Indexes (Partitioning): A separate index for
HR,Engineering, andFinance.
7. The Performance Tax: Is Security Slow?
Does metadata filtering slow down my retrieval?
The answer is: It depends on your index type.
- HNSW (Hierarchical Navigable Small Worlds): This is the most common index type. When you add a metadata filter, the vector database typically has to "Pre-filter" or "Post-filter."
- Post-filtering: The DB finds the top results, then removes unauthorized ones.
- Pre-filtering: The DB filters the documents first, then searches the remainder.
Pro-Tip: Ensure your metadata fields (like access_role) are Indexed in the vector database to avoid slow scans.
8. Dynamic ACL Synchronization
If your vector database has "Burned-in" metadata from three months ago, you have a security hole.
The Ingestion Sync Pattern
You need a "Permission Syncer" that runs alongside your data.
- Event-Driven Sync: When a file's permissions change, it triggers a webhook.
- Vector Patching: Your system updates the metadata on the vector store.
- No Re-Embedding: You only update the "Tag" attached to the math.
9. Handling Role Hierarchies
Rarely is a role just a single string. Usually, roles are hierarchical.
The Expansion at Retrieval Strategy
You keep the tag simple. When the "Director" logs in, your application expansion their roles. The IDP tells you the Director inherited the analyst role. You then pass the full list into the filter.
10. Post-Retrieval Verification: The Critic Node
Even after all these filters, how do we prove to an auditor that the user didn't see something they shouldn't?
We use a Verification Loop. In your LangGraph flow, after the "Generate" node, you add a "Verifier" node.
"You are a Security Auditor. Review the final answer against the user roles to ensure no violation occurred."
11. AWS and Google Cloud: The Enterprise Glue
Amazon Bedrock Knowledge Bases
AWS supports Metadata Filtering directly.
- You define filters in the
RetrieveAndGenerateAPI call. - The "Identity" is managed via IAM Roles.
Google Cloud Vertex AI Search
Vertex AI uses "Data Stores." You can create multiple data stores and assign IAM permissions to each.
12. Conclusion
Security is a Technical Debt, Pay it Early. A Role-Based RAG is only as good as the Source Truth.
Final Summary Checklist:
- Ingest with Intent: Stamp every chunk with an ACL or Role ID.
- Search with Scopes: Always use metadata filters at the database level.
- Validate the Hierarchy: Expand user roles at the moment of search.
- Audit the Output: Use a Critic/Auditor node in your agentic workflow.
Found this guide helpful? Join our newsletter for weekly deep-dives into Enterprise AI architecture, security, and agentic workflows.